Page 1 of 2

DEANOTEK KAT750S2 REBUILD INTO KAT 7/11.

PostPosted: Sun Oct 13, 2013 8:22 pm
by DEANOTEK
Image

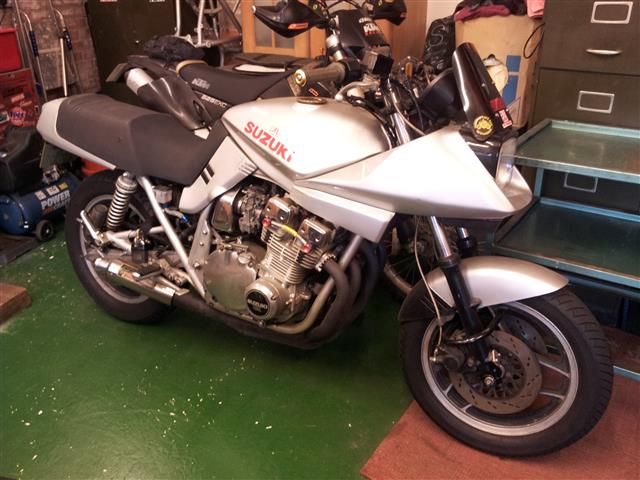
Well the time has come to move my Kat750s2 into the 21st century. The time has come for a stripdown & rebuild. She's looking a little tired around the edges, & sad at the side of the Kat1428 turbo.
I wont be going over the top, she will be done on a very low budget. Staying with the twin shock set up, & Bandit 1200 front & rear running gear. I'll probably shorten the seat by a few inches, as I like that look. Efe footrest hangers etc.. I have most parts luckily, so its just getting round to do the work.
The plan is for it to take around a year to do, so a bit here & a bit there when possible.

Wife says its about time I spent some money on her... (sorry wife hijacked thread!!! Bugger off wife !!!).

I will try to post pics & progress asap, best I can...

All the best Deanotek.

Re: DEANOTEK KAT750S2 REBUILD

PostPosted: Sun Oct 13, 2013 8:27 pm
by FBJ admin
Awesome. Will be great to watch mate. You popping along to Stafford. If ya need mint paint work doingpm me

Re: DEANOTEK KAT750S2 REBUILD

PostPosted: Sun Oct 13, 2013 9:11 pm
by busa ash
should be a good build this , I will be watching :)

Re: DEANOTEK KAT750S2 REBUILD

PostPosted: Mon Oct 14, 2013 12:20 pm
by DEANOTEK
Thanks FBJ for the paintwork offer, but I've got a workmate who can do paintwork/bodywork.. pretty cheap too. ;)
Unfortunatly I cant get to Stafford due to work, drat n' blast !!! :cry:

Image

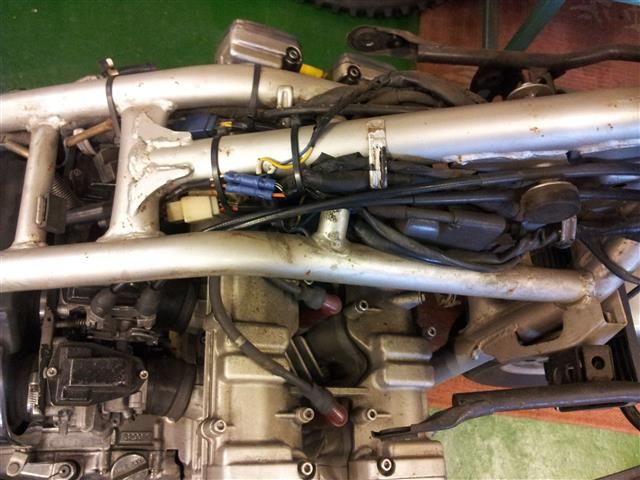
Looking a bit grubby under here..., when doing a stripdown its best to take loadsa photo's of where the wiring runs & cables etc, to make the rebuild easier later. Luckily I've got the proper Katana supplement showing it all.

Image

Petrol tanks a little rotten at the rear mounting points, but inside it looks good with no rust. It doesn't leak, but I will clean it all back to the bare metal at some point, to investigate/repair it. Luckily I have a spare non standard paint mint one, so I shall be using that.

DEANOTEK.

Re: DEANOTEK KAT750S2 REBUILD

PostPosted: Fri Dec 06, 2013 1:44 pm
by DEANOTEK
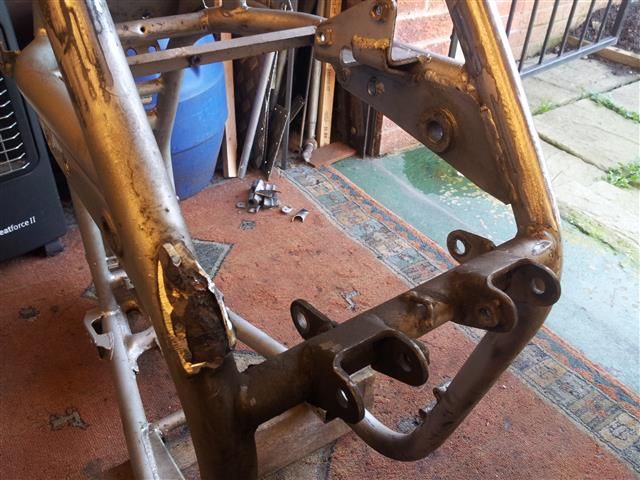
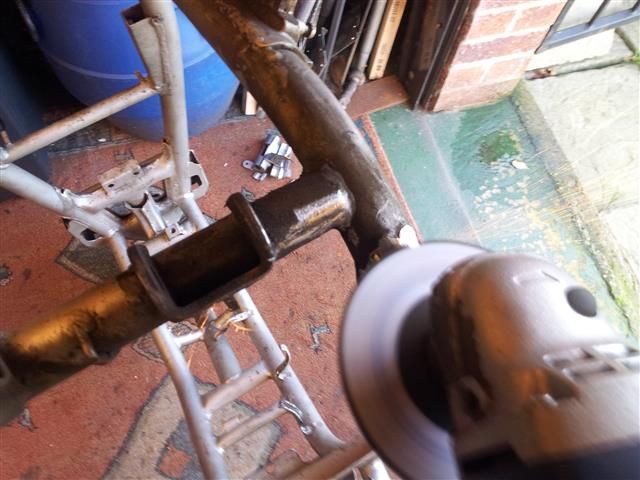
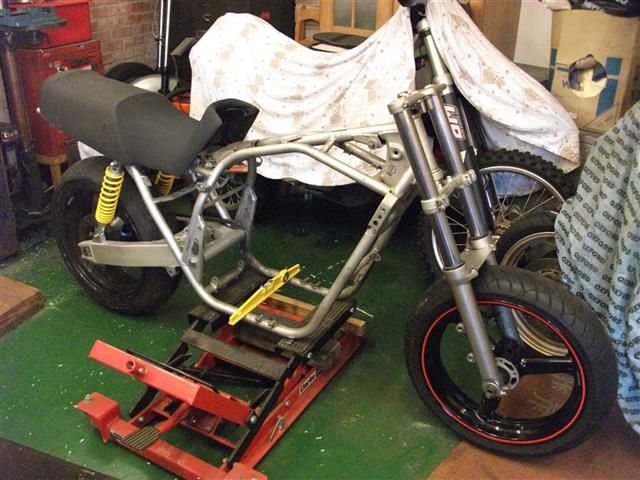
Well i've had a bit of time on my hands, so I've totally stripped the Kat down to the frame. I've cut the tubular footrest mounts off, & started to reprofile them back to the main frame cradle. I will be fitting the EFE type footrest plates as they look much better. I first did this type of mod back in 1990, to my big Turbo Kat.
Image


Image

When doing jobs like this its best to take your time, & don't be too greedy with how much you are taking off. Them grinders are brutal..

Image

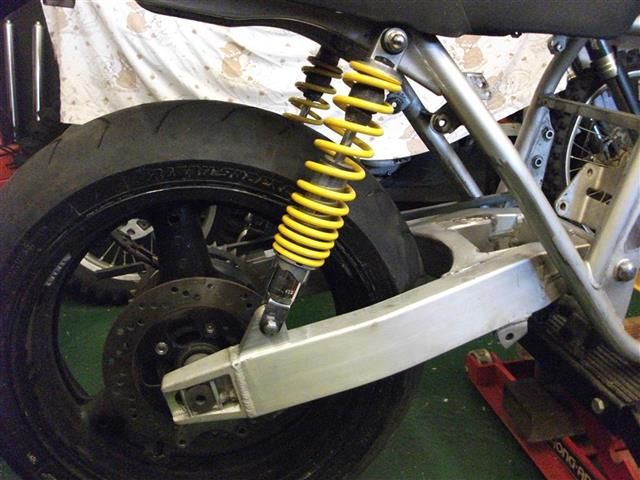
I've fitted the Bandit 1200 back end in, easy job, i just knocked up 2 matching swingarm top hat type spacers, with the bore the same as the swingarm spindle. The wheels bang on central,... if you lift the wheel up between the frame tubes, whilst mounted in the swingarm, it has the same clearance either side. I don't know if I've been lucky with this.. or if there is a little variation between frames, because FBJ had a few problems in this area... Hmm interesting... are these import frames slightly different,,.?? (This is a 750s2 import frame). Wouldn't have thought so,,??
Im sticking with the twin shock suspension set up, so made some alloy bottom shocker mounts that need to be welded to the swingarm at some point.
Image

When fitting the Bandit 1200 front end in, you have to press out the Bandit stem (too long), & fit the Kat stem. They fit straight in, same interference fit. This created a few problems for me, because when I fitted my Kat stem into the bottom Bandit yoke, it was way too loose..!!?? WTF..!! :roll: (is this another import difference ??).
So back in went the Bandit stem. After a bit of thought & eyeballing the job up, I noticed there was a lot of room where the bottom taper roller bearing fits, it drives down quite far, so after a bit of measuring I knocked up a 55mm wide, 18mm thick stainless spacer with a 30mm hole. I fitted the spacer on the stem all the way down to the bottom yoke, then drove the bottom taper roller bearing down to this... RESULT!!.. It does the job.

Image

The spacer could be made slightly wider, to match the width of the headstock if required. I machined a groove in the spacer, to aid future bottom taper roller bearing removal.

Image

Image

So that's where the project is at the moment..
All the best Deanotek.
Re: DEANOTEK KAT750S2 REBUILD

PostPosted: Fri Dec 06, 2013 6:33 pm
by FBJ admin
Looks like your making great progress there mate

Re: DEANOTEK KAT750S2 REBUILD

PostPosted: Fri Dec 06, 2013 8:13 pm
by spondonchris
I still haven't stopped drooling over your Kat turbo !!! Awesome build.
Will be watching this thread with interest. Good to meet you :D

Re: DEANOTEK KAT750S2 REBUILD

PostPosted: Sun Feb 02, 2014 7:16 pm
by FBJ admin
Hello bud. Can you give me dimentions of the spacer you put on ur bottom yoke. Im fitting bantit 12 to a et 750. 1170 motor though :-)

Re: DEANOTEK KAT750S2 REBUILD

PostPosted: Sun Feb 02, 2014 8:33 pm
by DEANOTEK
55mm wide, 18mm thick, 30mm hole .You could make it wider to match headstock width, would look better.
Hope this helps.

Re: DEANOTEK KAT750S2 REBUILD

PostPosted: Sat Feb 15, 2014 7:07 pm
by FBJ admin
Thanks for this bud.